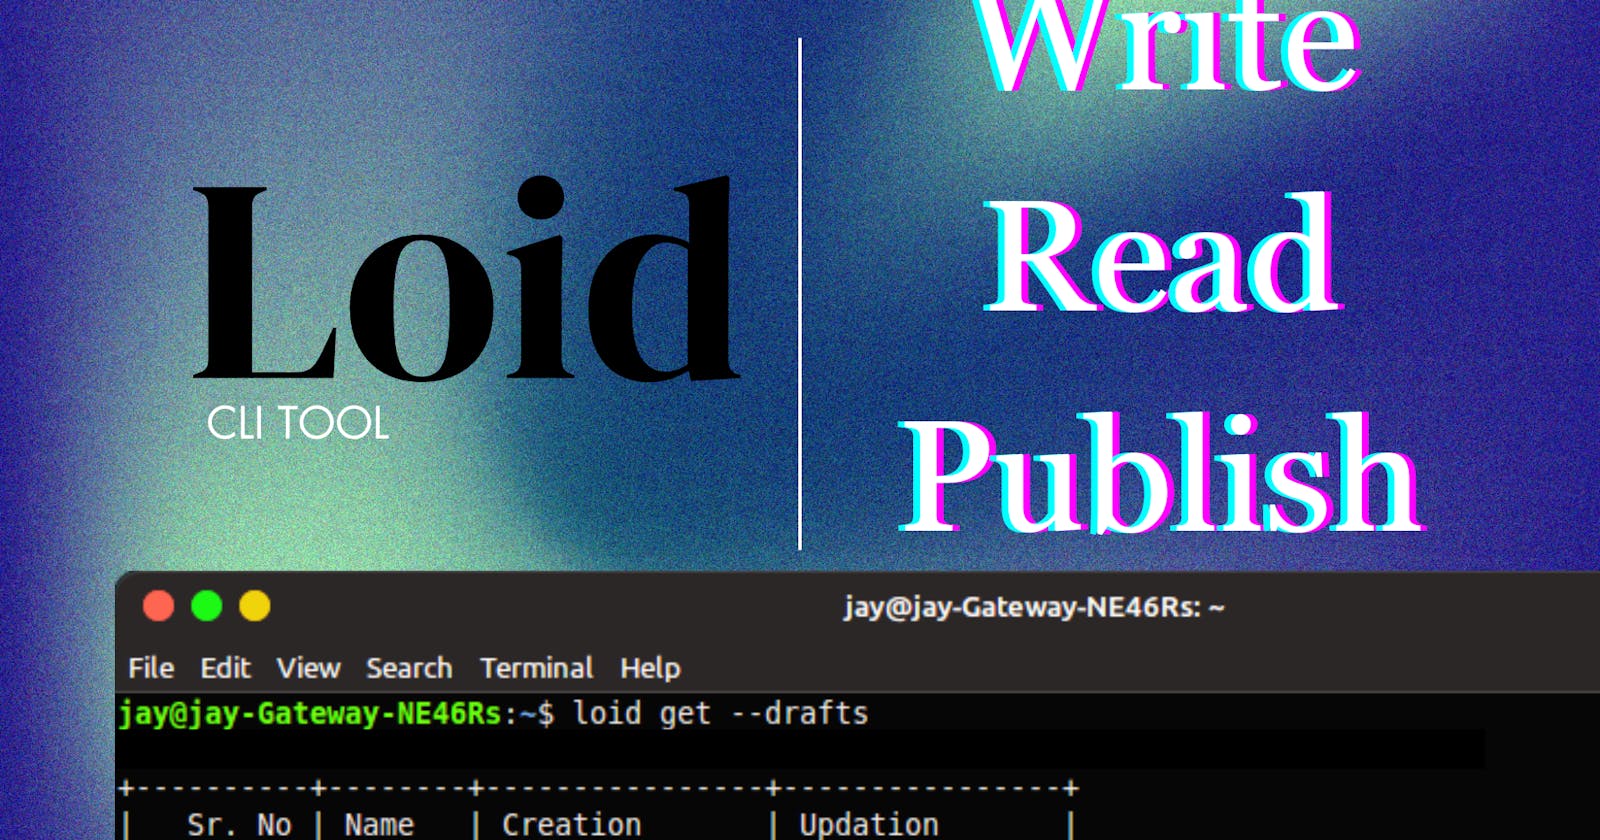
Loid - Read, Write and Publish blogs on hashnode straight from your terminal
Loid is a CLI tool that makes it easy to write,read and publish blogs on hashnode without leaving your terminal.


Ever been so busy programming that you just don't want to leave your workspace?
Loid got you covered, now Read, Write, and Publish articles on Hashnode without ever leaving your terminal. You don't always want to switch between your workspace and browser or just don't want to run your browser for a single blog and that's fine we have all been there at least I have :)
Loid makes it easy to read articles from your feed and publications you like with a single-line command in your terminal.
Loid has an inbuilt editor and viewer so that you don't need to open a text editor now that's what I call saving time at its finest

What's the problem with traditional blogging? Why do you need Loid ...
Nothing, matter of fact blogging on Hashnode is easy af sorry for the language. It's just that sometimes you just can't afford to lose your time switching and opening or maybe you do not want to lose that mindset you are currently in or maybe you just need to read a quick blog to refresh that's where Loid does its job the best.
Inspiration
I wanted to publish my blogs daily but I am a master at procrastination and opening Hashnode and writing a blog seemed like a heavy task and consumed a bit of time to think and write. While being a developer I always want to give updates on what I am working on, on the fly while I am making the project. The process is slow for a developer to write his experience, you just can't write everything about a project in one go you have to update the blog from time to time and then publish it.
The big idea
That's when it hit me. What's the best friend of the developer, The Terminal! If I could integrate Hashnode with my terminal that would solve my problem and right about then I discovered Hashnodes API and voila that's how Loid was born.
How can Loid be useful?
Embracing the use of this CLI tool for Hashnode brings a multitude of benefits, centered around productivity, minimalism, and time-saving. With the convenience of writing, reading, and publishing blogs directly from your terminal, there's no need for continuous switching between various platforms.
This tool streamlines the blogging process, offering a one-time feed for effortless blog reading. In a world where time is a precious commodity and schedules are demanding, this tool proves to be a valuable companion, catering to the needs of those who are too busy to engage in unnecessary complexities. Its seamless integration with Hashnode not only enhances efficiency but also fosters a minimalist approach to blogging, ensuring a focused and streamlined experience for developers and content creators.
Why use Loid tho?
All other CLI tools I encountered didn't have an inbuilt editor in it or were just lacking some features that a developer needs so I got to work and made Loid which gives all of those functionalities in one.
Content
Important: Make sure to write the blog in markdown, you don't have to give an extension Loid does that for you.
Installation
Make sure you have pip and python>=3.6 installed on your machine and follow the steps.
1. Setup the package
Download from the PyPI archive
pip install -U loid
or
Download from the GitHub archive
pip install git+http://github.com/captain0jay/loid.git
warning: Loid is POSIX-friendly. It might not work properly on the Windows machines at the moment.
2. Set the BLOG_DOMAIN environment variable
After the package is installed on your system, it's time to add the BLOG_DOMAIN environment variable. Create an account on hashnode.com, and replace your email with <HASHNODE_BLOG_DOMAIN> the following options.
> If you use the default bash shell
echo "export BLOG_DOMAIN=<HASHNODE_BLOG_DOMAIN>" >> ~/.bashrc
> If you use ZSH
echo "export BLOG_DOMAIN=<HASHNODE_BLOG_DOMAIN>" >> ~/.zshrc
3. Insert your personal access token
Now, your account's Personal access token. Simply run loid get with --auth option and enter your Personal access token.
loid get --auth
Features
Create Drafts on your local machine from your terminal
Open and edit those drafts
publish the draft on your Hashnode account with a single command
Get your already available drafts
Publish those drafts too
Get your feed from Hashnode
Get Publication posts
Read those posts
Read your drafts too
%[tenor.com/view/damn-damn-damn-damn-damn-rig..
We have all the necessary features available that we use daily on Hashnode.
In action...
in this example I created draft jay using loid create jay
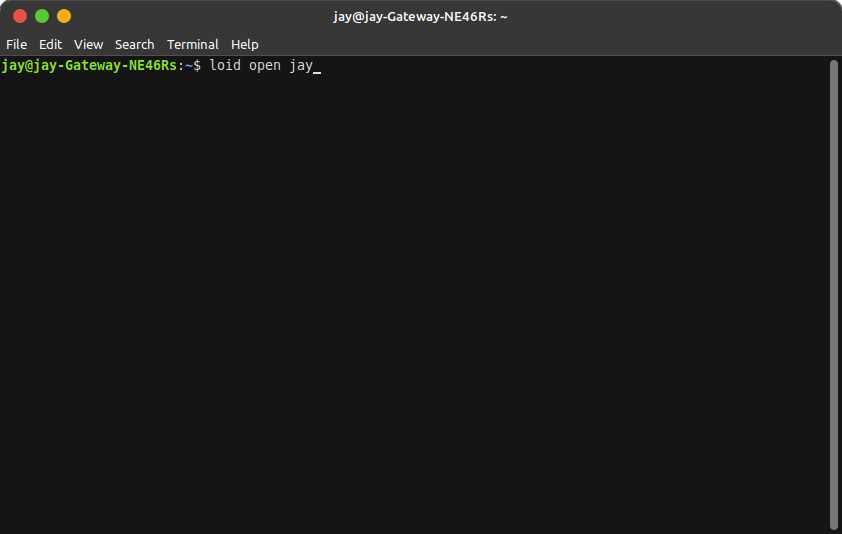
The above command opened jay in the terminal editor
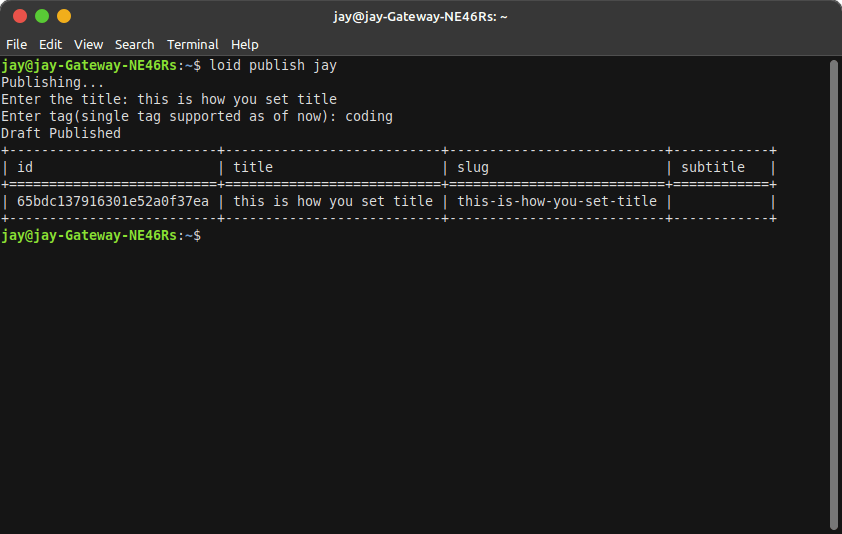
And just like that published in a single command
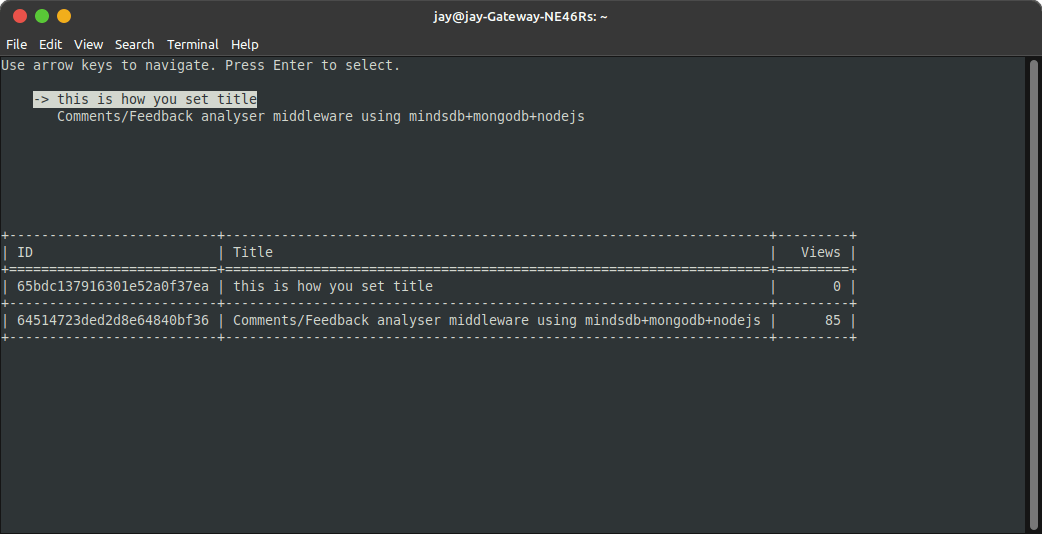
Fetch any publication in this case I am doing mine
Choose using arrow keys and enter
The text doesn't match because I forgot to save the text using Ctrl + s so I wrote it again and make sure you do not make this mistake save and quit using Ctrl + q :)

Exiting from editor or viewer
If for some reason Ctrl + q doesn't work for quitting the editor Ctrl + c should be used it will give the error but ignore it for time being it will get fixed soon
Update:
Whenever you are viewing posts from
loid get --feedorloid publication example.comyou have topress Qand thenEnterto exitwhile when you are fetching posts or draft separately just
press Qto exitWhen you have opened an editor to edit your draft press
Ctrl + qto exit
Usage
Use loid with commands from the list given here to perform various tasks available on Hashnode
$ loid create newdraft
Empty Markdown file 'newdraft.md' created in the 'drafts' folder.
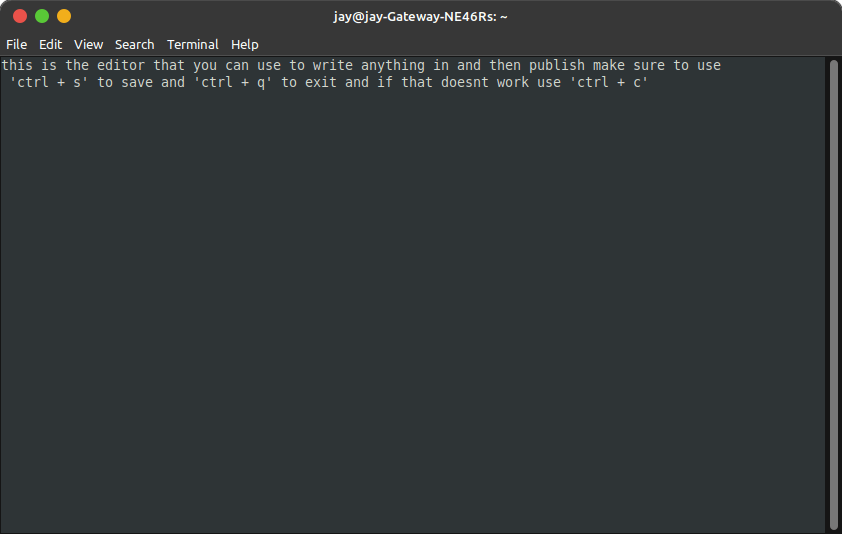
using the below command will open an editor which you can edit and save using 'Ctrl + s' and quit using 'Ctrl + q'
$ loid open newdraft
To publish an already created offline draft
$ loid publish newdraft
Returns publication post with title and ID that you can select and read in your terminal
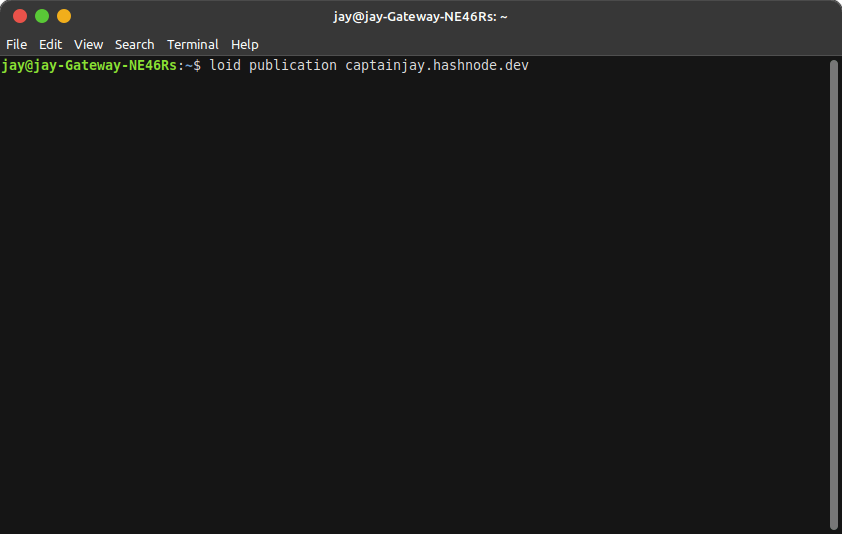
$ loid publication captainjay.hashnode.dev
To publish drafts already available in your Hashnode account (you can get ID using loid get --listonlinedrafts)
$ loid publishonlinedraft 000000000000000000
You can read the online draft available in your account but cannot edit it due to the functionality not being made available yet by Hashnode as soon as they release it, it will be available.
$ loid readDraft 000000000000000000
You can read any posts available on Hashnode (you can get the id using 'loid get --feed' or loid publicationexample.hashnode.com)
$ loid readPost 000000000000000000
List offline drafts with modification time
$ loid get --drafts
Get articles from your feed and select to read them its that easy :)
$ loid get --feed
Get your drafts that are stored online on the Hashnode account
$ loid get --listonlinedrafts
Returns the current version of Loid
$ loid get --version
Development process
Python was used for making loid its corresponding libraries had helped a lot in making this project. Curses was used to make terminal editor possible, keyring for safely storing Hashnode credentials, and Tabulate was used to show data in an organized manner.
Hahsnodes API was straight forward and easy to understand I wrote this script in like 2 minutes which fetches drafts
import requests
import json
from loid.scripts.draftpostviewer import openviewer
def getdraft(api_url, headers,draftid):
#-----------------publish draft-------------------------------
  mutation = """
  query Draft($id: ObjectId!) {
    draft(id: $id) {
      id
      slug
      title
      subtitle
      tags {
        id
        name
        slug
        logo
        tagline
      }
      content {
        markdown
        html
        text
      }
    }
  }
  """

  input_data = {
      "id": draftid
  }

  # Send the request
  first_response = requests.post(api_url, json={"query": mutation, "variables": input_data}, headers=headers)

  # Parse the response
  new_result = json.loads(first_response.text)
  # Access the data from the result
  data = new_result.get('data', {})

  postid = data.get('draft', {}).get('id')
  posttitle = data.get('draft', {}).get('title')
  postslug = data.get('draft', {}).get('slug')
  postsubtitle = data.get('draft', {}).get('subtitle')
  postcontent = data.get('draft', {}).get('content')

  formatted_string = f"""
    id: {postid}
    title: {posttitle}
    subtitle: {postsubtitle}
    slug: {postslug}
    info:  Press 'Ctrl + q' to exit


    {postcontent}
  """
  openviewer(formatted_string)
Now i cant show all of the code here but you can check it out on Loid's github repo but i do want to mention the star of our project the editor which was hard to make but we made it work :)
#!/bin/python3
import curses
import sys
import os

def main(stdscr,filename):
    s = curses.initscr()
    s.nodelay(1)
    curses.noecho()
    curses.raw()
    s.keypad(1)

    b = []

    md_filename = filename + ".md"


    # Get the directory of the current script
    current_dir = os.path.dirname(__file__)

    # Specify the relative path for the drafts folder
    drafts_folder = os.path.join(current_dir, "../drafts")

    # Create the drafts folder if it doesn't exist
    if not os.path.exists(drafts_folder):
        os.makedirs(drafts_folder)

    # Construct the full path for the Markdown file
    md_filepath = os.path.join(drafts_folder, md_filename)

    src = md_filepath

    R, C = s.getmaxyx()
    x, y, r, c = [0] * 4

    if len(sys.argv) == 2:
        src = sys.argv[1]

    try:
        # Read the initial content from a file
        with open(src) as f:
            cont = f.read().split('\n')
            cont = cont[:-1] if len(cont) > 1 else cont
            for rw in cont:
                b.append([ord(c) for c in rw])
    except FileNotFoundError:
        # Use default initial content if the file is not found
        b.append([])

    while True:
        s.move(0, 0)

        if r < y:
            y = r
        if r >= y + R:
            y = r - R + 1
        if c < x:
            x = c
        if c >= x + C:
            x = c - C + 1

        for rw in range(R):
            brw = rw + y
            for cl in range(C):
                bcl = cl + x
                try:
                    s.addch(rw, cl, b[brw][bcl])
                except:
                    pass
            s.clrtoeol()
            try:
                s.addch('\n')
            except:
                pass

        curses.curs_set(0)
        s.move(r - y, c - x)
        curses.curs_set(1)
        s.refresh()
        ch = -1
        while ch == -1:
            ch = s.getch()

        if ch != ((ch) & 0x1f) and ch < 128:
            b[r].insert(c, ch)
            c += 1
        elif chr(ch) in '\n\r':
            l = b[r][c:]
            b[r] = b[r][:c]
            r += 1
            c = 0
            b.insert(r, [] + l)
        elif ch in [8, 263]:
            if c:
                c -= 1
                del b[r][c]
            elif r:
                l = b[r][c:]
                del b[r]
                r -= 1
                c = len(b[r])
                b[r] += l
        elif ch == curses.KEY_LEFT:
            if c != 0:
                c -= 1
            elif r > 0:
                r -= 1
                c = len(b[r])
        elif ch == curses.KEY_RIGHT:
            if c < len(b[r]):
                c += 1
            elif r < len(b) - 1:
                r += 1
                c = 0
        elif ch == curses.KEY_UP and r != 0:
            r -= 1
        elif ch == curses.KEY_DOWN and r < len(b) - 1:
            r += 1

        rw = b[r] if r < len(b) else None
        rwlen = len(rw) if rw is not None else 0
        if c > rwlen:
            c = rwlen

        if ch == (ord('q') & 0x1f):
            sys.exit()
        elif ch == (ord('s') & 0x1f):
            cont = ''
            for l in b:
                cont += ''.join([chr(c) for c in l]) + '\n'
            with open(src, 'w') as f:
                f.write(cont)

def openeditor(filename):
    curses.wrapper(lambda stdscr: main(stdscr, filename))
Besides that, it was made with my love and community support ;)
What's next?
Next loid will improve further by giving almost all functionalities available on Hashnode API making it more efficient.